How to set up Time Machine on Synology
Introduction
![]()
Synology NAS's are commonly used as backup destinations. There are several reasons for this
- They support a large amount of storage necessary for hosting backups.
- They support several file sharing protocols.
- They come with Synology backup apps like Hyperbackup
- They allow the admin to install 3rd part backup solutions using the app store or docker containers.
Overview
In this post, I'll cover how to set up Synology as a time machine backup destination.
There are several steps:
- Enable SMB
- Configure SMB Advanced Settings
- Create shared folder.
- Add share folder as a backup destination in time machine.
- Setting up Time Machine Backups
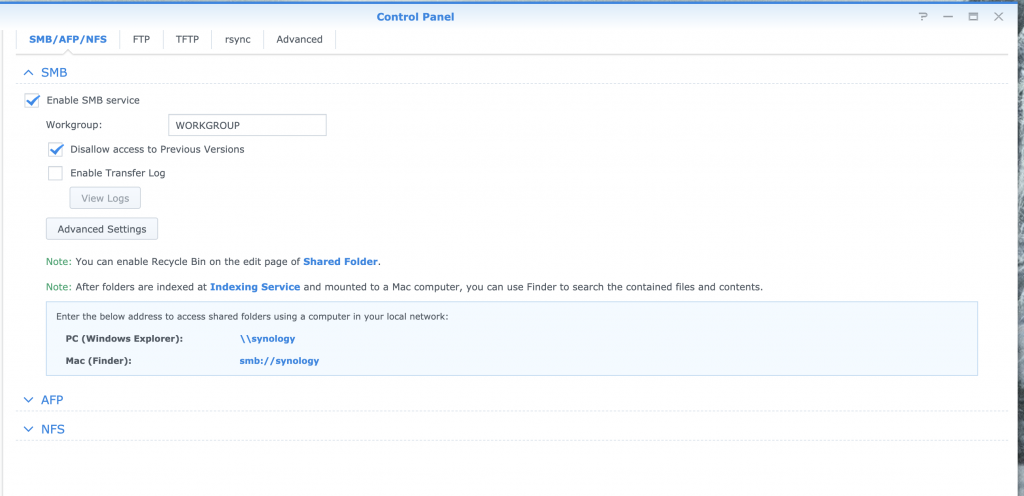
Enable SMB
To enable SMB
- Open "Control panel" app.
- Navigate to "File Services->SMB/AFP/NFS" tab in the "File Sharing" section.
- Select "Enable SMB service" and "Disallow previous versions" and
click "apply"
- Select the "Advanced setting" tab. Expand Bonjour and enable
"Time Machine broadcast over SMB."

You could stop here, but there are known time machine reliability issues if you don't enforce usage of newer versions of SMB protocol. Which brings us to the next step.
Configure SMB Advanced Settings
- On the SMB screen, click on the "Advanced Settings" button.
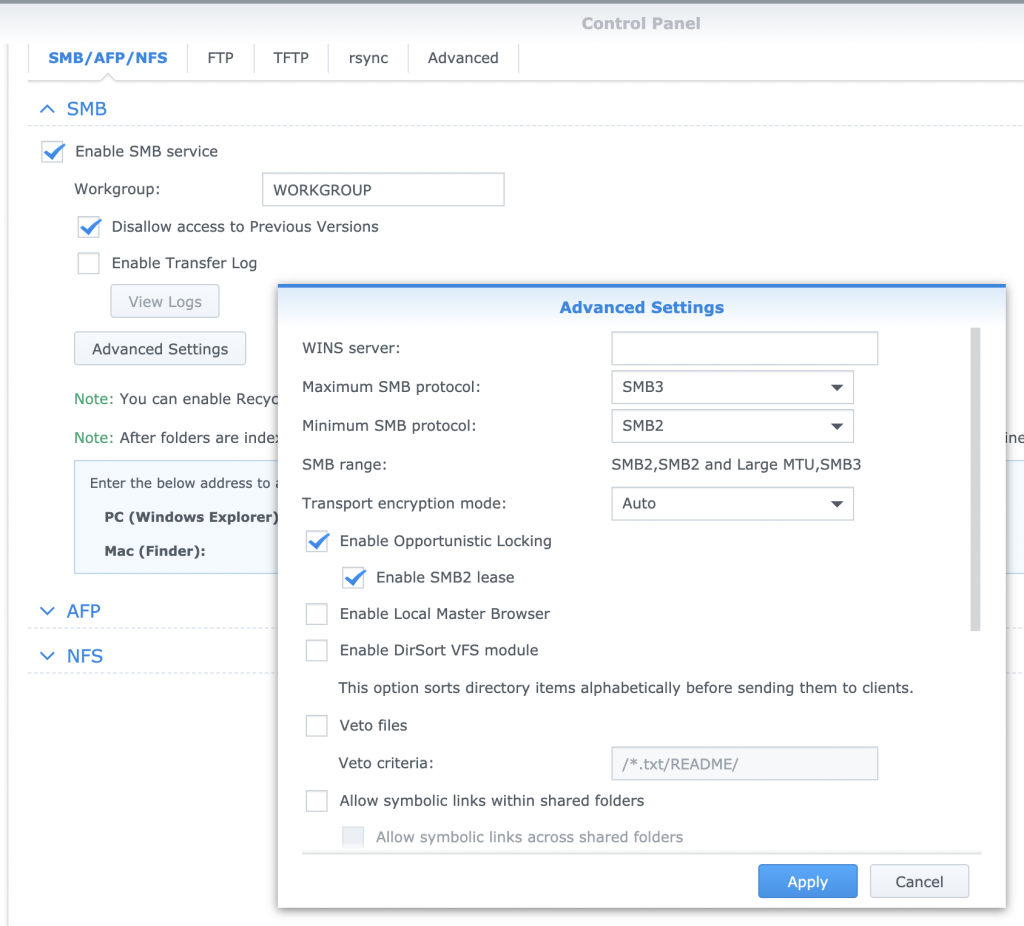
- Here set the minimum to SMB2 and maximum to SMB3. Click apply.
Explanation: SMB version 1 is insecure and should be avoided. You might be able to get away with SMB ver 3 as the minimum, depending on your needs.
If you skip this step, you will probably see strange errors in Time Machine and your backups will intermittently fail.
Below are a sample of errors that I have received before enforcing Min version.
- "backup disk not available"
- "The network backup disk does not support the required capabilities."
- "error code 45."
Create a Shared folder
In Synology DSM, you can divide up a single volume into multi file shares. In this section, we'll set create a "time_machine" share for storing backups.
- Navigate to Shared Folder in the "File Sharing" section.
- Click on "Create"
- Enter the Name/Description and click apply.
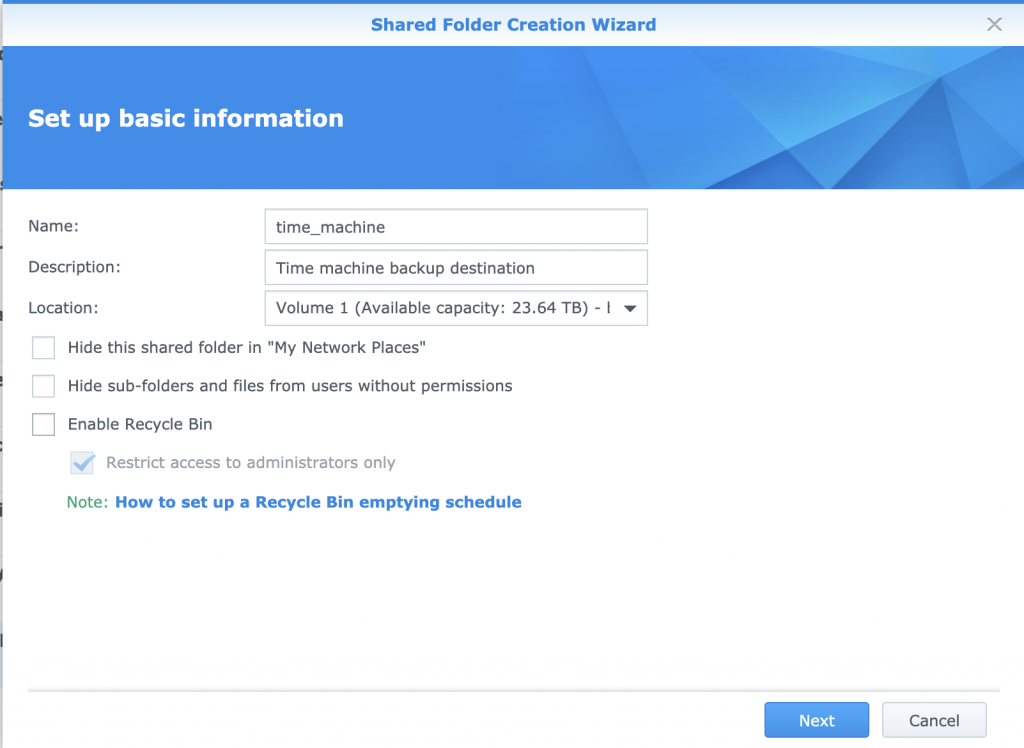
- Skip encrypt.

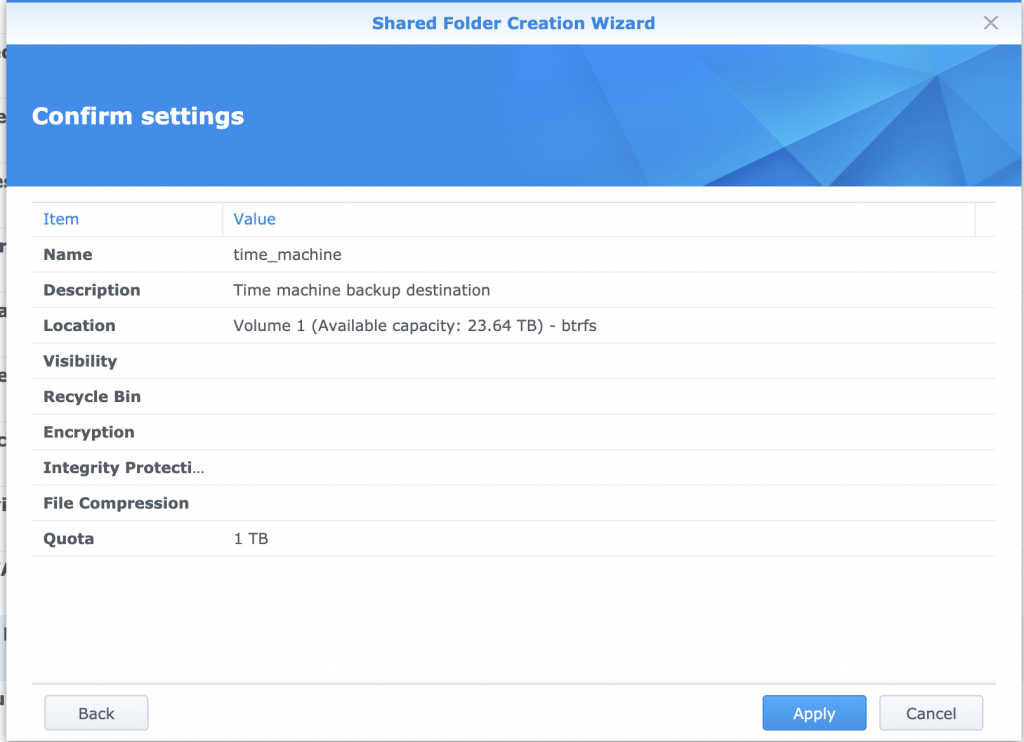
- On the advanced settings screen, set a quota if you'd like. 2x
internal storage is the recommended size. The system I use has 512GB
so I'll make the quota 1TB.
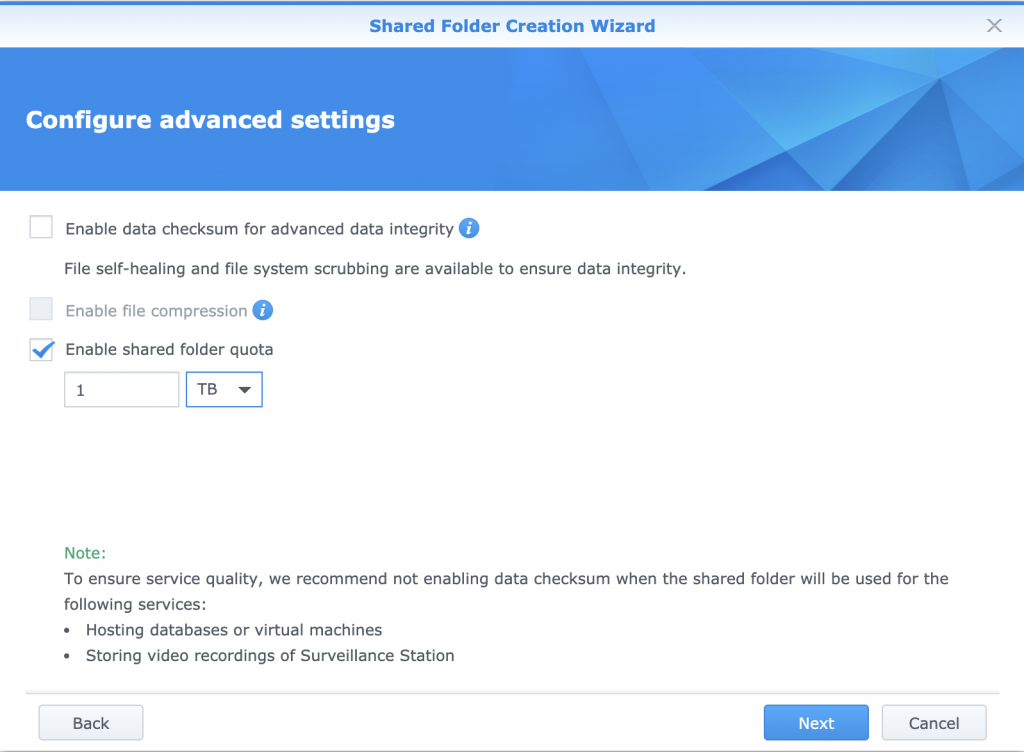
- Confirm settings and click "Apply"
After you create the file share for time machine , you can go back and edit it. For example. you can create a dedicated time machine backup user to limit access to the share.
Add Shared Folder to Time Machine
- Open up Time Machine preferences in Systems Preferences.
- Click on "Add or Remove Backup Disk"
- The "time_machine" disk should be in the "available disks"
list.
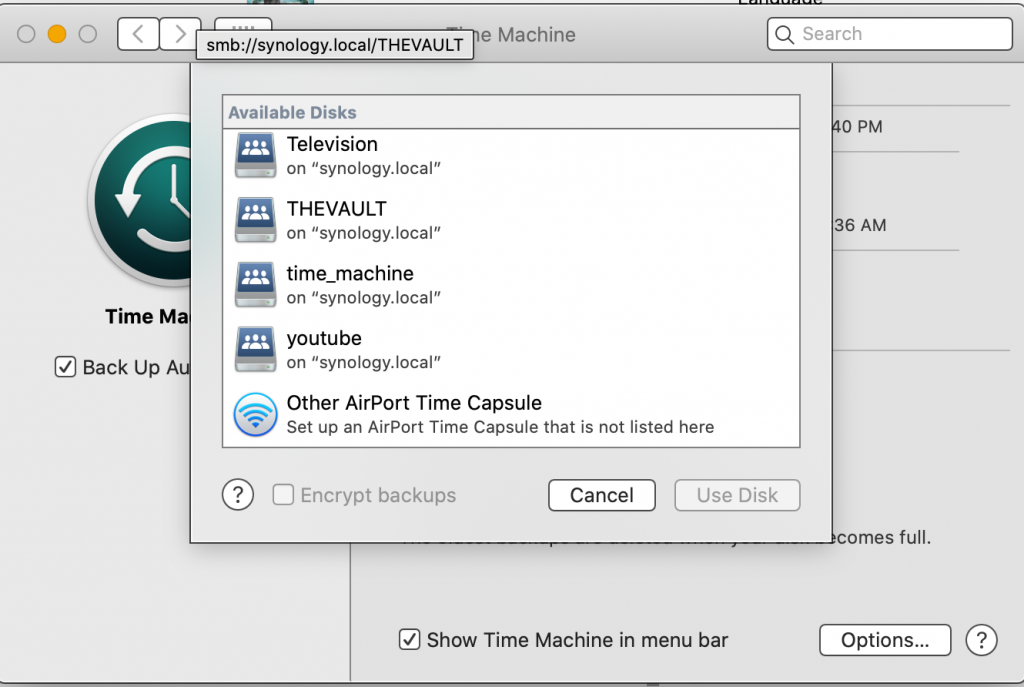
- Enter username and password to use to connect to the file share. Save it in KeyChain if asked.
Note that you may need to wait a few minutes for the new file share to be visible. What worked for me to speed it up, was to navigate to the share in Finder. After I did that , the "time_machine" share appeared in Time Machine available disks list.
Conclusion
At this point you should have a working, stable Time Machine destination complete with a quota to limit the size. If you have any tips or questions, please feel free to comment below.